Receiving RCS Messages
Prerequisites
Before proceeding, ensure you have obtained an RCS sandbox agent and API key as described in the prerequisites.
Installation
Initialize a new Node.js project:
Install the Pinnacle TypeScript SDK, Express, and dotenv:
Install development dependencies:
This guide uses version rcs-js>=2.0.3. It’s compatible with the following
runtimes: Node.js 18+, Vercel, Cloudflare Workers, Deno v1.25+, Bun 1.0+, and
React Native.
Configuration
Create an .env file in your project root and add your Pinnacle API key and signing secret:
Setting Up a Webhook
To receive inbound RCS messages, you need to configure a webhook in the Pinnacle dashboard:
- Navigate to Development > Webhooks in the Pinnacle dashboard
- Click Create new webhook
- Give your webhook a descriptive name
- Enter your webhook endpoint URL
- For local development, use an ngrok tunnel pointing to
localhost:3000/inbound-rcs - For production, use your deployed server URL
- For local development, use an ngrok tunnel pointing to
- After creation, copy the signing secret and add it to your
.envfile - Add your RCS sandbox agent to your webhook for it to receive messages. You must also whitelist the devices you want to test with by navigating to your sandbox agent and adding test device phone numbers.
Optionally, you can configure custom HTTP headers (e.g. X-API-KEY) to be
sent on every webhook delivery. Add them in the dashboard or via the
headers field on POST /webhooks/attach.
The PINNACLE-SIGNING-SECRET header is reserved.
Creating Your Webhook Endpoint
Create a new TypeScript file (e.g., index.ts) and add the following snippet to the right.
The code above creates an Express endpoint that:
- Receives webhook POST requests at
/inbound-rcs - Verifies the webhook signature using your signing secret
- Processes incoming message events and replies to a button press by the user
Running Your Server
Start the Express server:
Your server will start on http://localhost:3000. If you’re using ngrok for local development, start it in a separate terminal:
Use the ngrok URL (e.g., https://abc123.ngrok.io/inbound-rcs) as your webhook endpoint in the Pinnacle dashboard.
Testing Your Webhook
Go to localhost:3000/send-rcs/+12345678910 (e.g., to your whitelisted number). If there are no errors, you should see something like
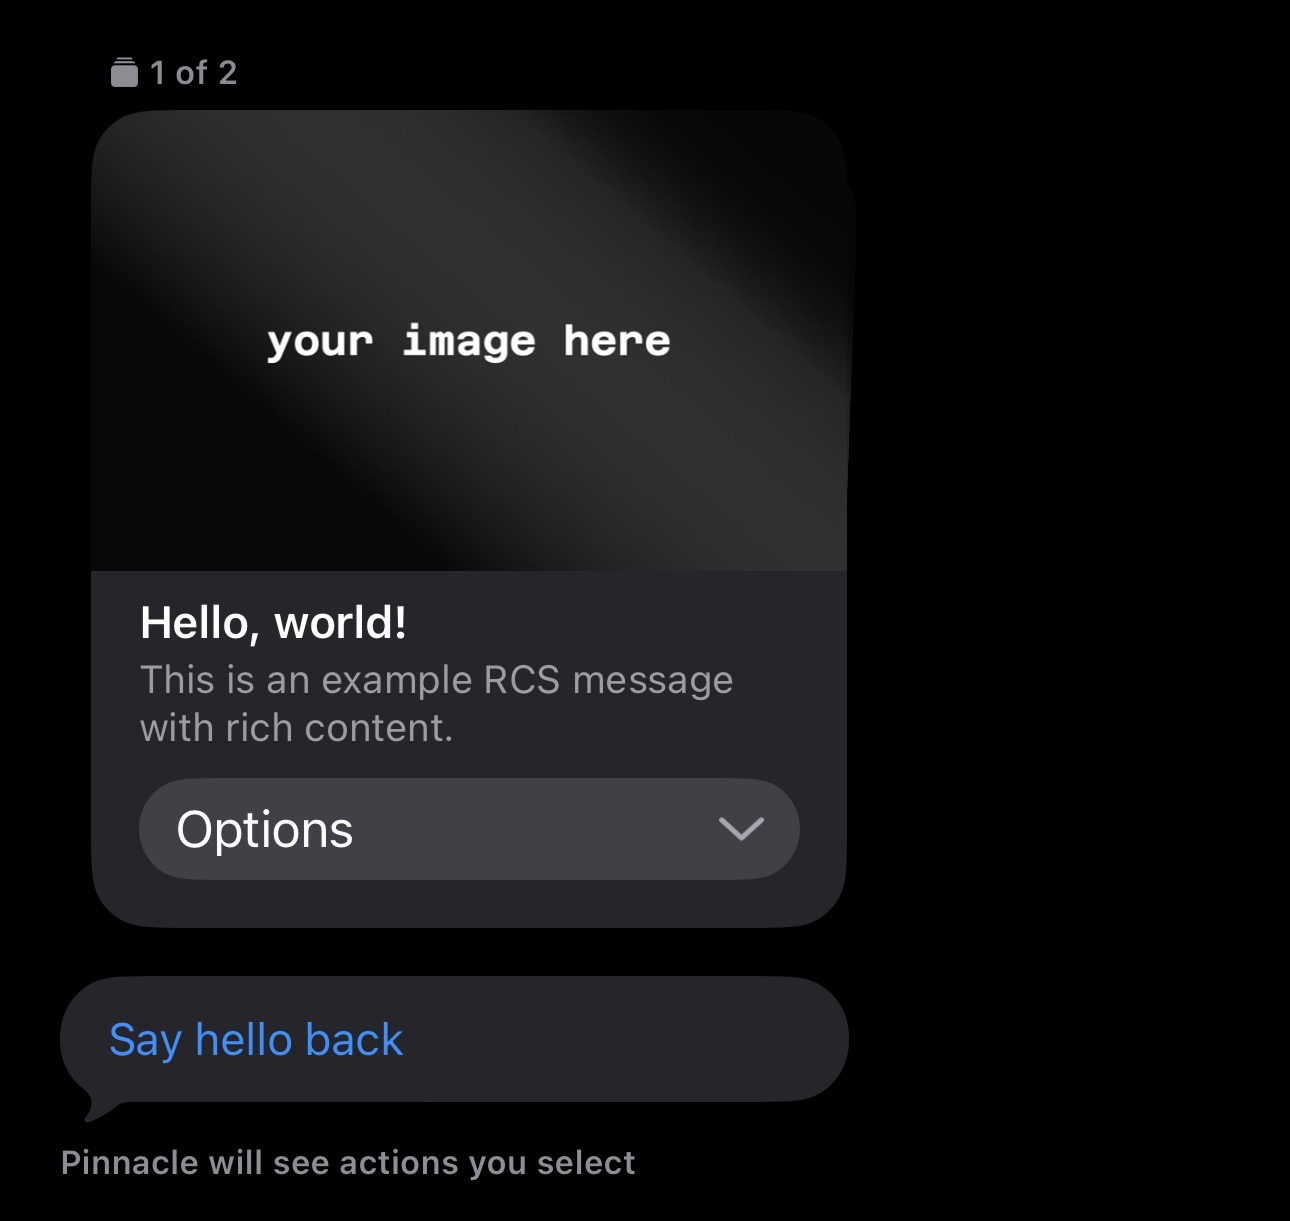
and receive a message on your whitelisted device like this:
If you’re not receiving any messages, make sure you have
- Your RCS sandbox agent associated with your webhook
- Your test device is whitelisted
If you tap “Say hello back”, your whitelisted device should receive a text saying “Hello! Button clicked successfully.”
With that, your webhook should now be successfully receiving inbound RCS messages as well message status updates for outbound messages! You can monitor these statuses by filtering events by their message direction set to outbound:
For more detail about processing the message payload received, please view the process method.